Wednesday, 5 August 2015

All Stuck Up - Part One

Whilst sailing this past weekend I made the unpleasant discovery that the centreboard refused to be lowered.  In the thirteen years since Bluster was launched I have never experienced this.  No amount of poking or wiggling from about could convince it to cooperate. 

Centreboard pennant should not normally be slack while hauled up


Back on the trailer I took a look and could see a couple of cm of the trailing edge of the centreboard protruding – normal it would be tucked up inside the case out of sight.

Centreboard peeking out with no visible means of holding it up.

This looks like this is a job to be tackled from below.

There is a surprising amount of information on the Internet pertaining to jammed centreboards and how to approach the problem.  When inserting the centreboard during the build I was fortunate to have at my disposal a couple of air hoists and slings which made this a pretty easy operation.  Without access to a lift I will apply some creative thinking to this.


X-Ray of the patient


Please stay tuned…

First Sail - 2015

It has been one full year since Bluster has been in the water.  With work, family and home commitments as well as my other activities this just did not happen.    Adding to my frustration was the fact that I was not getting to the maintenance and cleanup activities which I enjoy.   Some years are like that. 

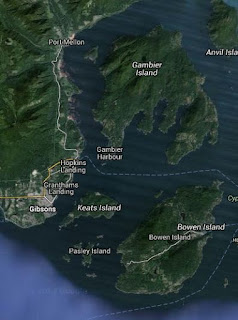
Moving forward I was happy to have a nice clear extra-long BC Day long weekend to do some boating.  Launched Bluster nice and early at the Gibsons Landing ramp and also secured a slip for two nights in the marina there.   It was already becoming a hot day when I touched down at the Granthams Landing public dock to pick up Lisa and Farley.  We spent the morning and afternoon sailing and motoring around the southern bays of Gambier Island. 


After a long downwind run we turned to tack back upwind when I discovered my centreboard jammed in the case.  We were still able to tack but not as high nor come about as smartly as we should.

A hot day

Lookout #1

Lookout #2
I noticed last year that my reliable Honda 5 hp outboard was have trouble with slow speed and idling and this did not by some miraculous means resolve itself over the winter.  It is OK if I run keep the revs a little higher at slow speeds but think it is time to pull and clean the carburetor.

Well sun baked and satisfied at the end of the day we motored back to the marina.  With the engine troubles requiring higher revs it felt like we were entering the marina and little fast so just at the breakwater I throttled down just a hair and (naturally) the engine died.  I was thankful for cork-like Chebacco design and my quick thinking, skillfully wielded boat hook crew fending us off the barnacles until I restarted.   Without further ado we found our slip and secured the ship for the night.

The next morning we headed out early to avoid the heat of the day on glass like seas for a three hour motor cruise around Shoal Channel.  


Early morning cruise

Pretty Keats Island cottage

Back to the slip for Bluster and on to our activities ashore.


Early the next morning haul out and back to the storage lot.  I like to avoid the launch ramps at peak times and with my current tow vehicle I aim for a high tide retrieval.

Not a lot of sailing this weekend but enough to rekindle our enthusiasm.  Now, to the lists…

Tuesday, 23 June 2015

Cockpit Tent 1.0

One of the many wonderful design features of a Chebacco is the generous cockpit.  Some 20 foot sailboats sacrifice cockpit for cabin space but it has been my experience (with my style of sailing) that vastly more time is spent in the cockpit than below.  That said there are times when a little more covered living space would be nice. 
I did a little research on cockpit covers and found these can range from a basic blue tarp draped over the boom to complex Sunbrella and tube frame structures.
Before spending money on expensive materials I decided to make an inexpensive mock up using white polytarp and white duct tape.  Using the boom as a ridge pole I made measurements every foot in length from the boom to outside the coaming. The resulting shape is sort of a tapered rectangle.  I transposed the shape to the white tarp and cut it out after adding a bit for the edge seams.  All edges  were finished with white duct tape and some left over brass grommets were hammered in.


After a couple of trials would say the cover works as well as could be expected.  Not a lot of head room but a life saver for sitting out a hot and sunny day at anchor.  A definite improvement over a basic tarp which is too square to fit properly over the tapered rectangle shape required.  Total cost was under $20.